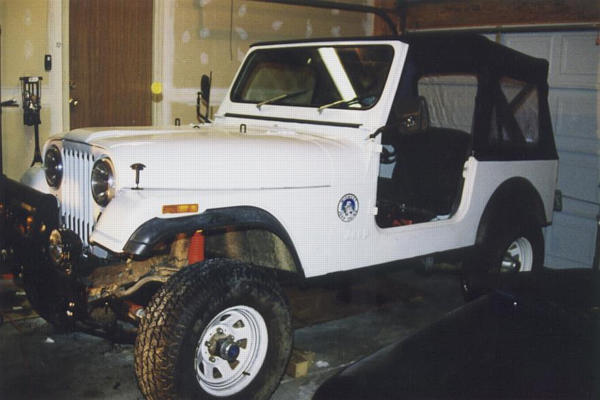
See my Main CJ Page for the real 'before' pictures.
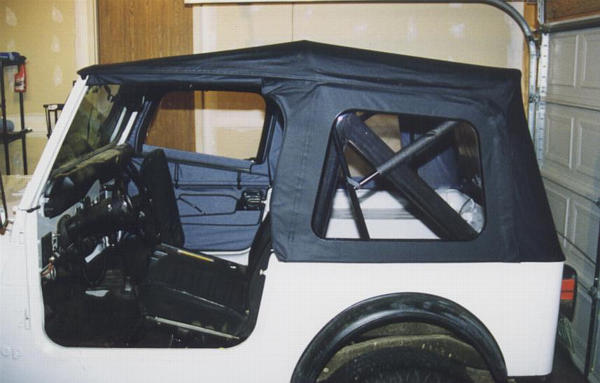
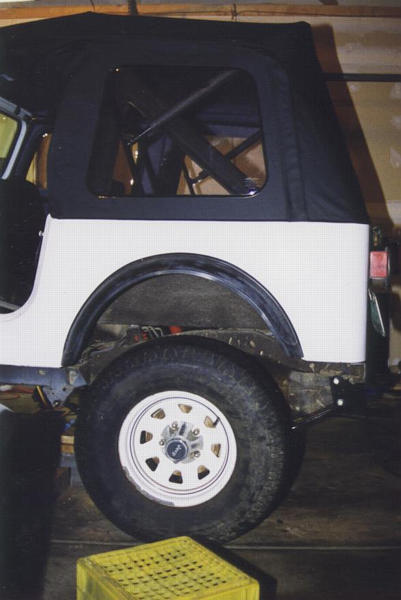
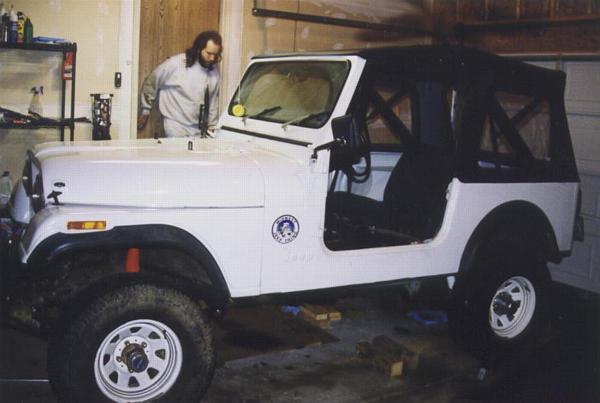
This is the new top. Looks pretty much like a Supertop, but has 2 latches to open the 'sun roof', and the rest folds down just like a Supertop.
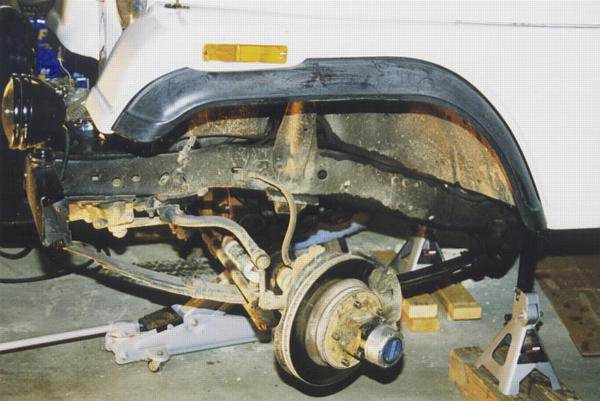
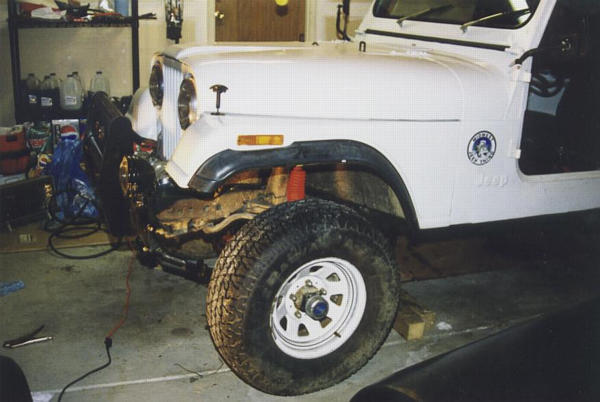
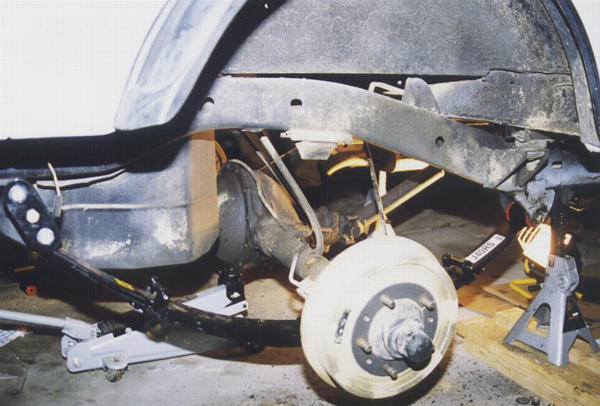
This is the front after jacking it up and removing the wheels and shocks.
Notice the brake line still has plenty of slack in it, even though the
suspension is at full droop. You can also see the old sway bar links,
and you can kinda see the old pitman arm.
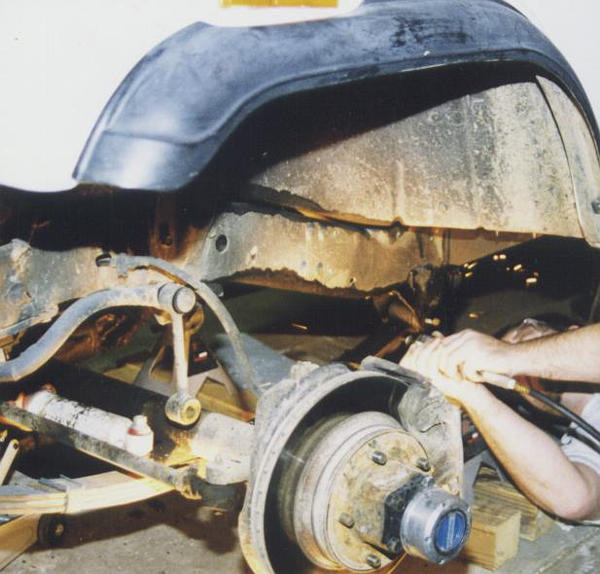
We had some trouble getting the springs off of the spring hangers at the main eye.
Chris P. brought his air cutter/grinder and saved the day.
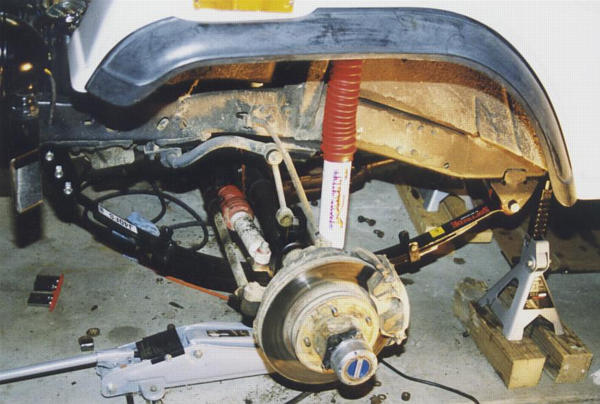
This is the front after installing the new spring and shock. Notice how
tight the brake line is pulled now.
These photos were taken after both springs and shocks were replaced
up front. We put the wheels back on so we could set the front down
and work on the back. It's quite nose-up at this point. Turns out,
when we raised the rear and put it on jack stands, the vehicle was still
tilted nose-up...
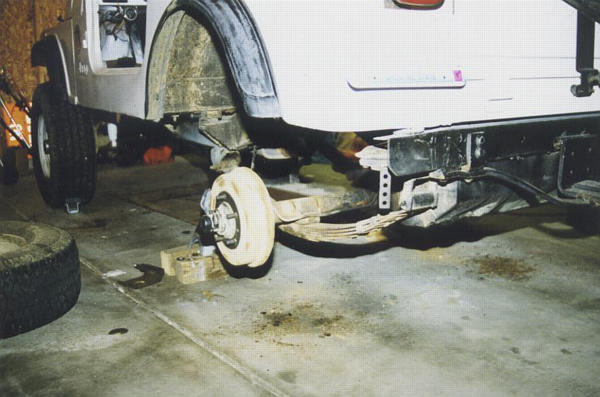
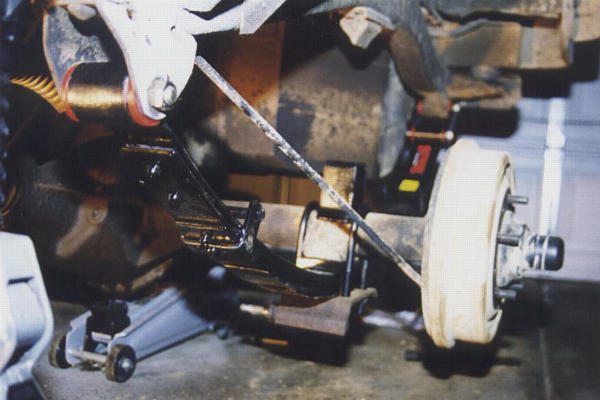
This is the rear, after jacking and removing the tires, shocks, &
U-bolts.

After removing the old spring, the new spring is ready to be hung.
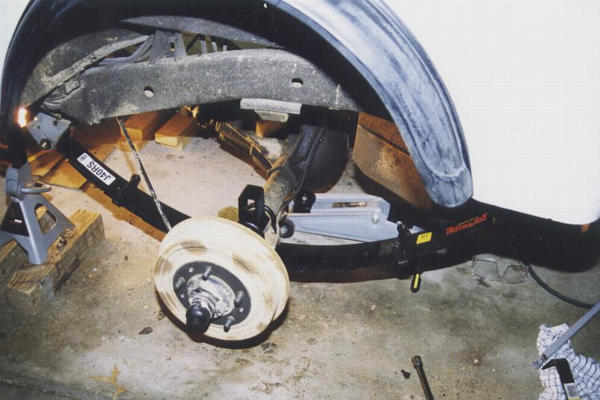
This is the other side, after hanging the new spring and attaching
the axle with the new U-bolts and old plate. You can see the emergency
brake cable, very tightly stretched between the frame and brake assembly.
You can also see the bump stops, attached by one of the U-bolts.
The first side again, after hanging the new spring. You can kinda make
out the center brake line which will need to be replaced with a longer
one, and you can also see the vent hose, somewhat stretched, too.
Another view of the left side. You can easily see the emergency brake
cable and new bump stop.
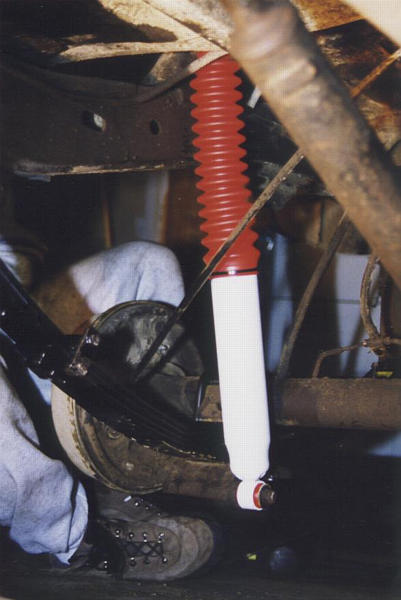
Here I've just completed the installation of the new right rear shock.
The rear, back on its meats.
A view of the whole vehicle, back on all fours. My preliminary
measurements put the actual lift height gain at about 4.5", but I still
need to double check the torque on everything, so that may change as
all of the spring mount points find their 'home'.
I ordered a buttload of kits & other parts from Four Wheel Drive Hardware,
and received the lot on Jan 5, 1999. This included the following:
- Supertop Sunrider and 2-piece doors (Bestop -- Black Denim)
- Pedal pads for brake and clutch
- Front and Side Turn Signal Assemblies
- Tail Light Assemblies
- Skyjacker 4" Lift Kit -- springs, u-bolts, a full set of
replacement bushings, and a transfer case drop kit
- Skyjacker Softride Nitro Shocks (all 4 corners)
- Bump Stop Extensions (Skyjacker)
- Dropped Pitman Arm (Skyjacker)
- Heavy Duty Replacement Shackles (4wdh -- front & rear)
- Extended Brake Lines (Goodridge -- 2 front, 1 rear)
- JKS "Quick-Disconnect" Sway Bar Links
Tue, Jan 5, 1999
Brought everything home and unpacked it. Installed the pedal pads (a real toughie...). Tried installing the front signals, and things are still screwy. I think I'm going to need a full replacement wiring harness, just so I can feel good about the electrical system.
Wed, Jan 6, 1999
My brother Steve came over to give me a hand with the new soft top. Installation of the soft top & doors went entirely according to the instructions included with the kit. The only help would have been some better illustrations regarding how certain pieces were supposed to fit and align, particularly the piece that fits along the top of the windshield. The result is a soft top that doesn't require the weird channel in the top of the windshield. Just flip open two latches, flip the top back, and you've got a sun roof! Just disconnect the door frames to flip the rest of the top back for open-air driving (but not in this weather!).
Sat, Jan 9, 1999
First, measurements were taken of the 'before' setup, so we'll know how much good we did when we're all finished.Steve W. was my primary assistant through most of the lift installation. He insisted he was doing it because he was having fun & learning stuff, but he was a bigger help than he thinks. Couldn't have done it without him.
We decided to start with the front end because two jacks will be needed to jack up the back (there's currently nowhere in the center to jack the back end up with a single jack) and I only have one hi-lift. We jacked the front end up and set it down on jack stands just high enough to take the tires off. The tires came off, then the shocks. No real problems yet.
Next came all of the U-bolts. These things have been rusting and battered for 15 years, and were a real pain to get off. We tried using a nut-cutter on them, but only one of them actually split. The others were a *small* bit easier to get off as a result, but the impact wrench was useless for these. After getting the U-bolts off, the lower ends of the sway bar links were removed from the U-bolt plates and the plates came off.
We had difficulty with the upper end of the sway bar links, so they're still hanging from the sway bar. My JKS disconnects come in later this week, so I'll address that problem again when the replacements are here. We also had *serious* difficulty with the nut on the pitman arm. We (Chris) eventually got the nut off, and we subsequently broke a Craftsman pulley-puller (stripped its threads) trying to get the pitman arm off of the steering box. We got the nut off the other end of the pitman arm, but can't get the tie rod out. I guess I need a pickle fork...
With the axles now completely detached, we started working on the springs. We started with the drivers side. The shackle end came apart without any problems. On the other end, the nut came off, leaving the bolt and the metal sleeve rusted to each other and to the frame. I made a call to Chris Patrick, who immediately understood the problem, and offered to come lend a hand with his cutter/grinder. He did his thing on the driver's side spring, and we soon found out we had the same problem on the other side. Chris made it look simple, and soon we had both new springs on.
We then started in on attaching the axle to the new springs. We had some problems getting the nut & bolt on the bottom of the spring to fit into the center hole in the mounting plate, so we decided to call it a night.
Sun, Jan 10, 1999
The next evening, after trying with several different tools to make the center hole in the plates just a *little* bit bigger, we were able to get the plates & U-bolts mounted, along with the extended bump stops that were purchased.At this point, it *almost* looks ready to set back down. Installation of the new shocks went without a hitch, and we put the tires back on, and set it down. The shackle and spring eye bolts and the U-bolts still need to be torqued to spec.
Preliminary (until the back end is done, too) measurements indicate that we've raised the vehicle a full 4.5 inches.
I should be getting access to a second jack very soon, and we'll get the back end up and started. I anticipate similar problems to what we had on the front end: *really* difficult U-bolt nuts, and frozen-up bolts at the main eye end of the spring. But we won't have to deal with the sway bar or pitman arm stuff.
Mon, Jan 11, 1999
Just got done with another several hours of work. We got the back jacked up with the help of a second hi-lift (we only had two more notches left, and we still had to jack each end of the axle up an inch or so to get the tires off, and the jack stands are at their upper limit AND sitting on 4x4's...). Actually, with the back end on jack stands, the vehicle STILL isn't level... the nose is still higher than the tail. When we go to put it back on all fours again, we'll probably need to do it with floor jacks on the axle, rather than hi-lifts on the bumper...We got the shocks off without much problem, and we got all of the U-bolts off. The U-bolts took just about as much work as the front, but we're working smarter now. We tried one of the main eye bolts and found it the same as the front had been, so we decided to call it a night. We'll cut those off next time. Besides, if we got those cut off tonight, then we'd be at a point that we could start reassembly, and we'd probably be up all night getting it done. We opted for sleep...
Tue, Jan 12, 1999
Found some tools for attacking the pitman arm problem: A pickle fork, and a pitman arm puller, which is really just like a heavy-duty pully puller. Didn't get anywhere with those tonight. We'll try again later.Got lucky and only had to cut out one of the main eye bolts. The shackle bushings were a bit of a pain, as they were pretty dried up and hard. We got the new springs hung and the axle attached with the U-bolts and old plates. We didn't have the same problems with the center holes in the plates this time, either.
Tried to replace the rear brake line with an extended one and didn't get very far. The connections were just too gummed up and too hard to reach. I'll probably have this professionally done, now.
Got the new shocks on and set it down. It's once again standing on its own, but 4" higher!
Still need to do (or have done elsewhere): brake line extensions, sway bar links, pitman arm, transfer case drop.
Wed, Jan 13, 1999
And on the fifth day, he rested.Took a day off. Did receive my other parts, though, including some turn signal lamps and my JKS Sway Bar Links! Boy, these things are beefy! Can't wait to get them on. I think I'm lacking the right bolt to attach the top, though... Any advice appreciated... The bottom goes onto a stud on the u-bolt plate, and the top goes into ???. I haven't yet disconnected the old links from the sway bar...
Thu, Jan 14, 1999
My brother came over again to lend a hand with some stuff. We got the transfer case drop kit installed. We broke the new tool trying to get the pitman arm off. We tried working on the brake lines, only to find out just how stuck together the old lines are. We got nowhere trying to get the old sway bar links off of the sway bar.It seems the bolt (shoulder bolt?) that connects the top end of the sway bar to the sway bar link is actually rusted to the sway bar itself. The nut came off fine, but the bolt won't budge. This is true on both sides of the vehicle. We found an exploded view of this in my Haynes manual on page 11-2. I'm going to try to find some rust solvent for this and the pitman arm. Also maybe a pickle fork set and air hammer for the pitman arm...
Sat, Jan 16, 1999
Chris and I (mostly Chris) really layed in to the pitman arm and sway bar links, and we got them off! On the pitman, we tried pickle forks, the cutter/grinder, and a torch, and it finally gave way, though we can't be sure which method actually made the difference...The only thing left to make this thing drivable is the brake lines. I think I'll get some bulk brake line from a local auto parts place as a temporary fix, and make it better later...
Sun, Jan 17, 1999
Finished torquing down all of the U-bolts and shackles. The front is up on jack stands again because of the brakes, so I can't really measure yet. Some time this week it should be ready to drive.
Mon, Jan 18, 1999
Bought some brake line from the local parts store and tried to install it. I suck at this. I'll be having this done professionally...
Tue, Jan 19, 1999
Made an appointment for Thursday at my local auto shop. They'll be replacing hard brake lines as necessary, and installing the flexible lines I got from 4WDH.
Wed, Jan 20, 1999
Tightened up the sway bar links, tied the loose brake lines up out of the way, put on the tires and the hard doors (they seal better for now, since I haven't properly adjusted the soft doors yet, and we're expecting rain), and hooked 'er up to the ZJ for the trip to the shop tomorrow.
Thu, Jan 21, 1999
The Jeep went to the shop today, but they didn't get it finished. They should get it done tomorrow, though...
Fri, Jan 22, 1999
Got the Jeep back from the shop, & the brakes are great.Two problems remain:
The shift lever is out-of-center in its hole in the floor due to the transfer case drop, and I can't shift into 2, 4, or Reverse. I'll have to trim the hole out a bit to accommodate.
It doesn't sit level. I'll be loosening all of the spring eye and shackle bolts to bounce it around some and re-tighten. That should make it as close as possible...